
Sound experiments for kids
How sound is made, how vibration travels, why some sounds are high and others low. Simple experiments with rice, a ruler, cups, string and rubber bands.

Why does rice jump when it’s loud?
You need: a large bowl, plastic wrap, a large rubber band, 2-3 tablespoons of rice, a pot and a wooden spoon
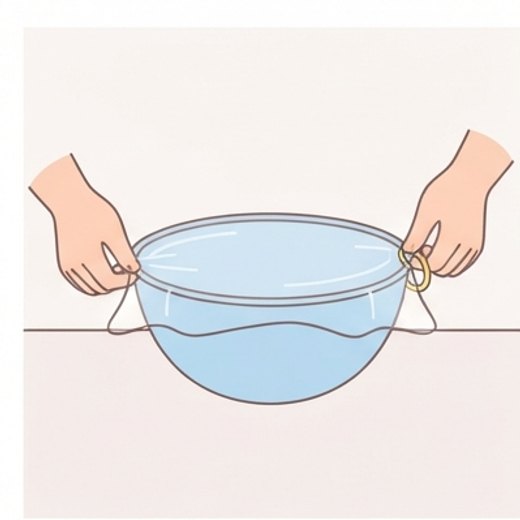
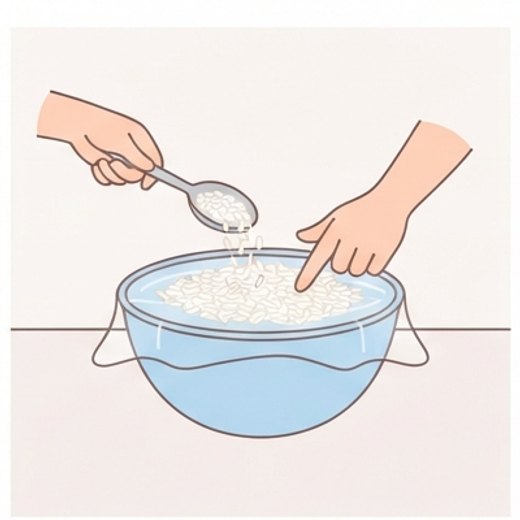
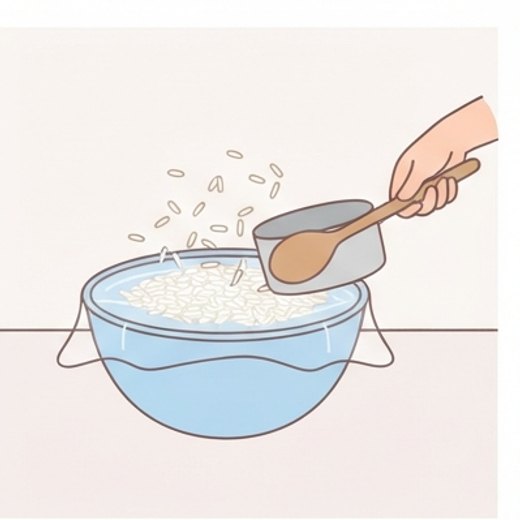
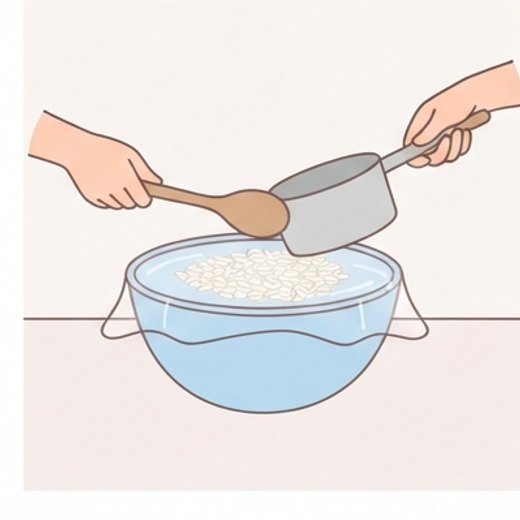
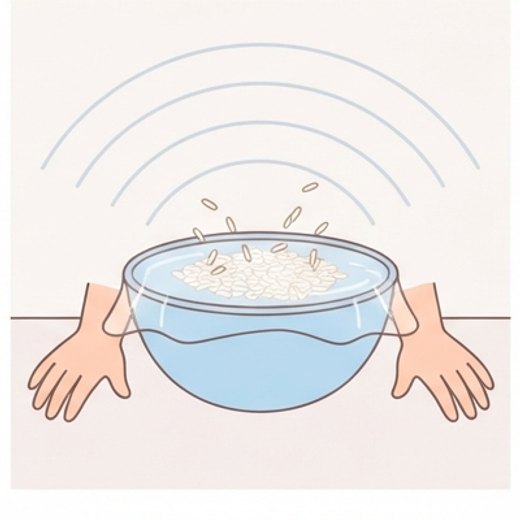


What happens: The grains of rice bounce and dance on the wrap. The louder the sound and the closer the pot, the higher they jump. A quiet sound barely moves the rice.
Why: Sound is vibrations traveling through the air. Hitting the pot makes the air around it move in waves. The waves reach the tight wrap and make it shiver, like the skin of a drum. The shivering wrap tosses the light grains up. Our ears work the same way: inside each one is a thin membrane, the eardrum, that vibrates when sound reaches it.
Safety: Do not bang the pot right next to a child’s ear; the sound can be too loud. If your child still puts everything in their mouth, do not leave them alone with the rice: an adult must be watching. An adult sets up the wrap.
Try next: Try sugar, cream of wheat or tiny bits of paper. What jumps best? What happens if the wrap sags?

Where does your voice live? Feel it with your fingers
You need: just your hands
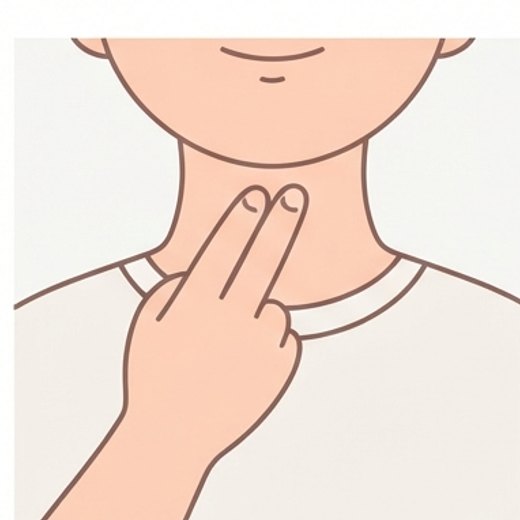
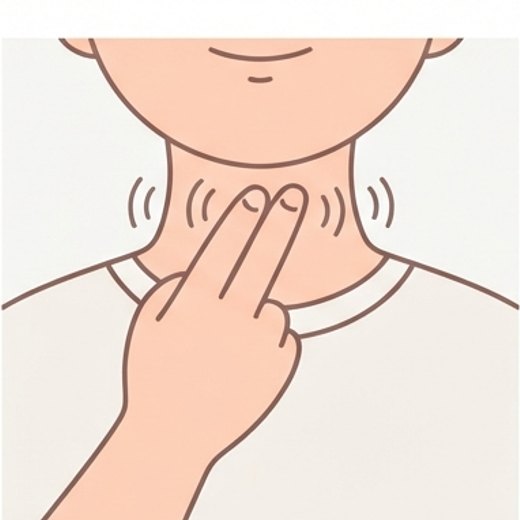
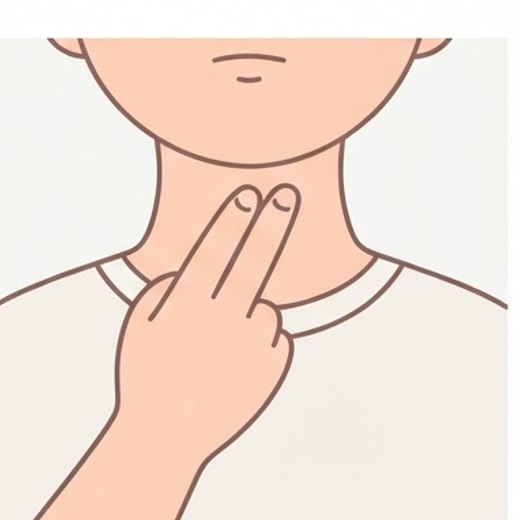
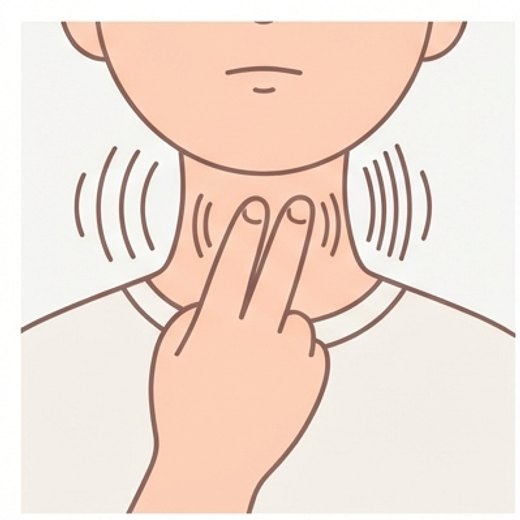
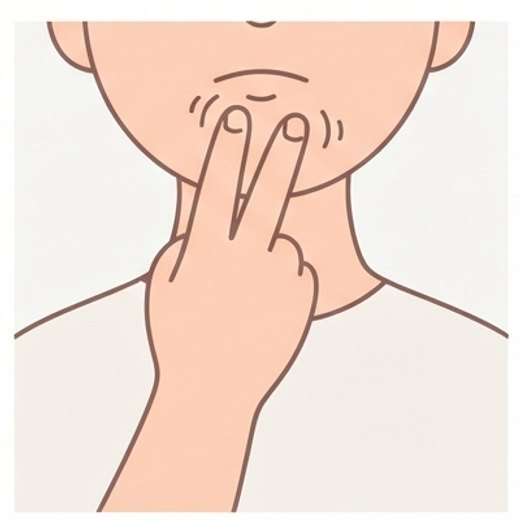


What happens: When you hum, you feel a tiny, tickly buzzing under your fingers. When you are quiet, it is gone. A low voice and a high voice feel different.
Why: Your voice is made in the voice box (larynx), where the vocal cords are. Air from the lungs passes by them, and they vibrate quickly. These vibrations make sound. That is why your neck buzzes while you are making a sound, and when you are quiet, the vocal cords are still. Not every child feels this spot equally well: some find it easier to feel the vibration on their chest or face.
Safety: Fingers only touch lightly; do not press on the throat.
Try next: Put your hand on your chest, and then on your face near your nose, while you hum. Where is the buzzing strongest?

How does a voice travel along a string?
You need: two paper or plastic cups, 3-5 meters of strong thread or twine, two buttons or paper clips, a pencil
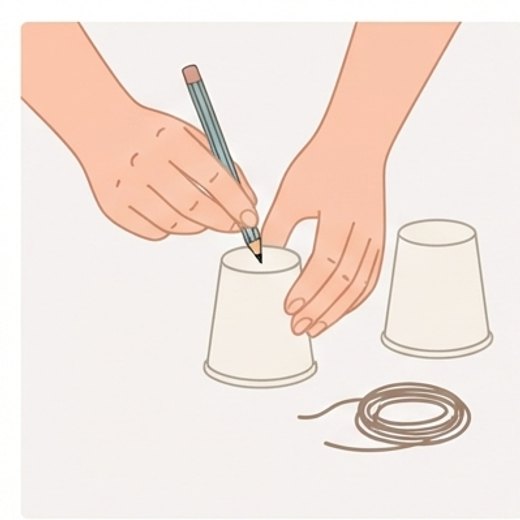
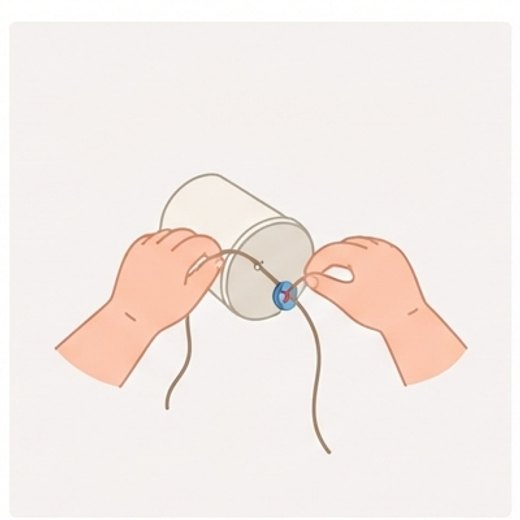
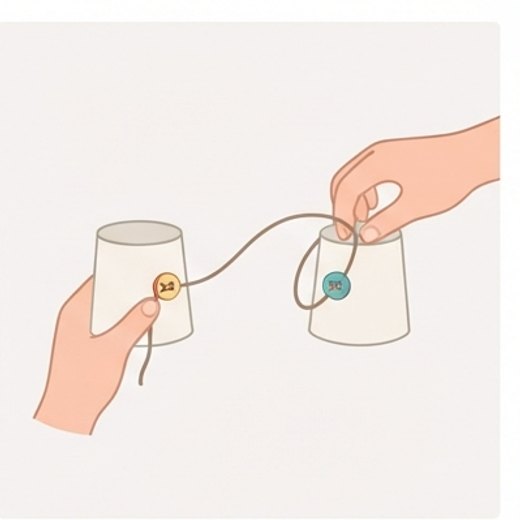
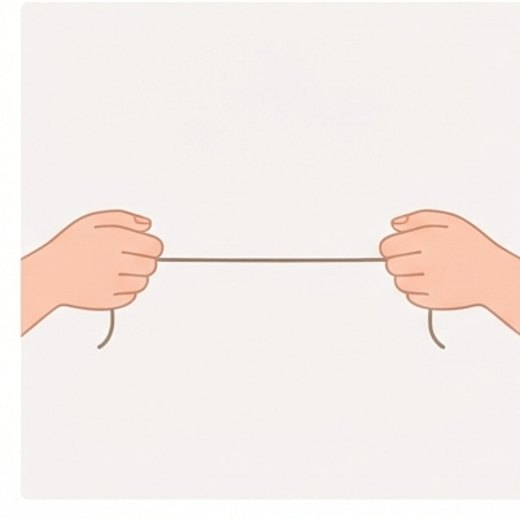
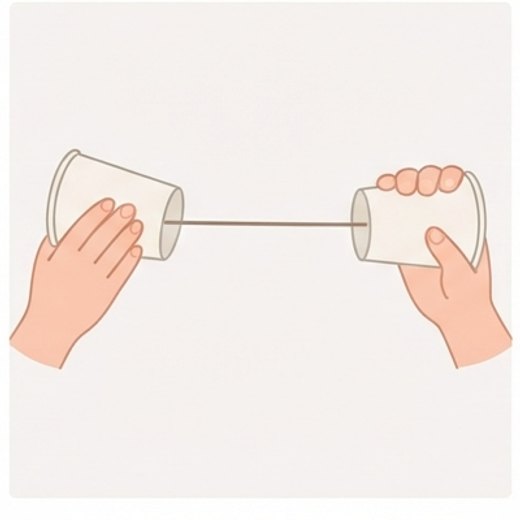
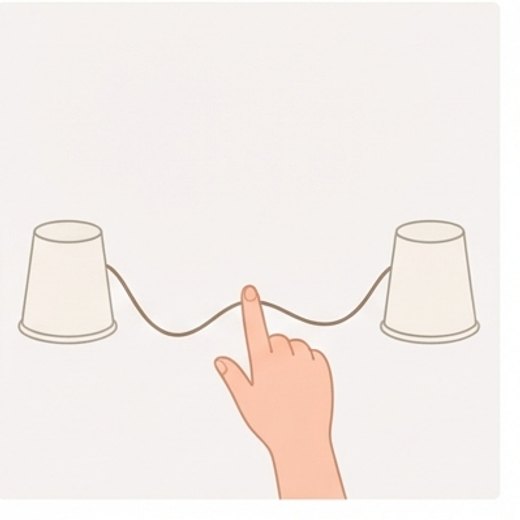


What happens: With a tight string you can hear even a whisper. With a slack string the sound almost disappears. If you pinch the tight string between two fingers, the voice is gone too.
Why: When you talk, the air vibrates and the bottom of the cup starts to shake. These vibrations run along the tight string to the other cup. Its bottom shakes and makes sound again in the air next to the ear. Solid things like string pass vibrations along well, but a slack string dampens them. Pinching fingers dampen the vibrations too.
Safety: An adult makes the holes so children do not poke themselves with the pencil.
Try next: Try strings of different lengths and cups made of different materials. What sounds best?

Why does a short ruler sound higher?
You need: a 30 cm plastic or wooden ruler, a table
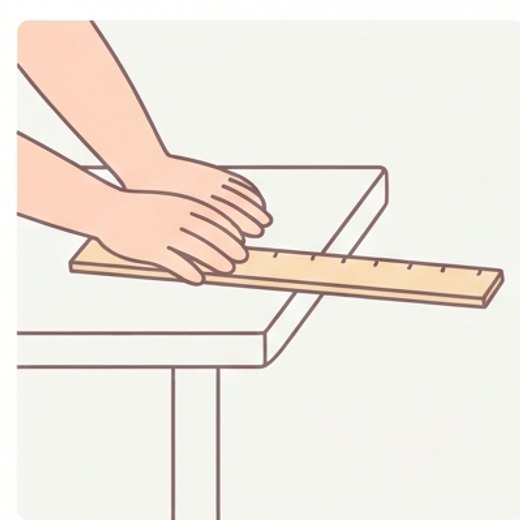
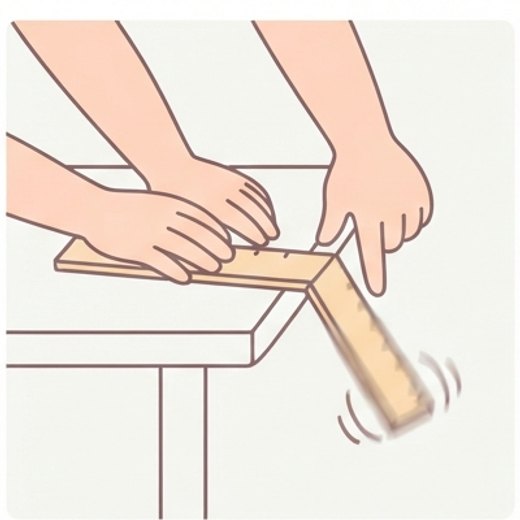
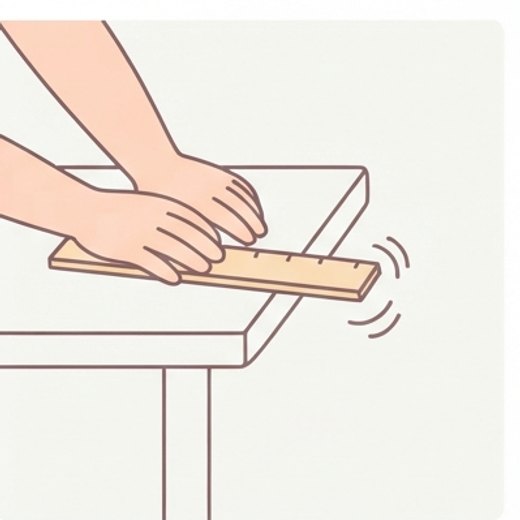
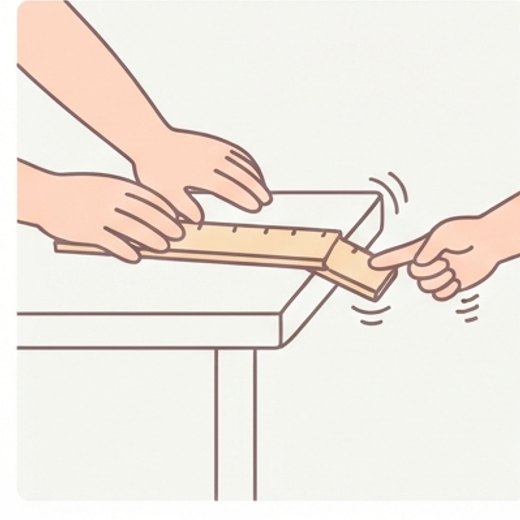
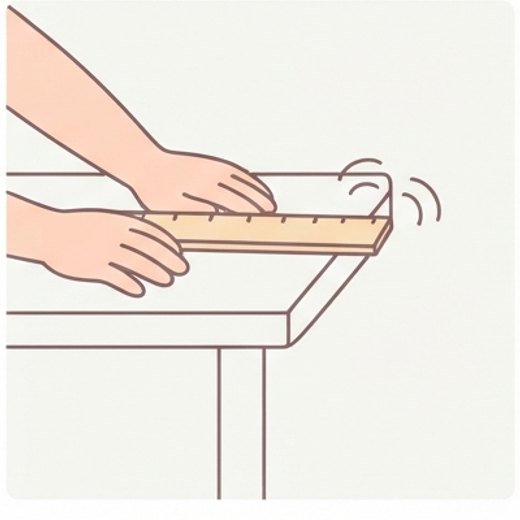


What happens: The shorter the part sticking out, the faster it vibrates and the higher the sound. A long part hums low and slow, and a short part buzzes high.
Why: The sound of the ruler comes from its vibrations, which pass into the air. A shorter part vibrates faster than a longer one, so it has a higher frequency. The pitch of a sound depends on exactly this frequency of vibration. A long part vibrates slowly, so its tone is lower.
Safety: Keep your face away from the end of the ruler when you let it go. Press it firmly to the table with your palm.
Try next: Try the same length with a metal ruler and a wooden one.

Rubber band guitar: low and high sounds
You need: an empty box without a lid (for example, a shoebox or a tissue box), 3-4 rubber bands of different thickness, a pencil
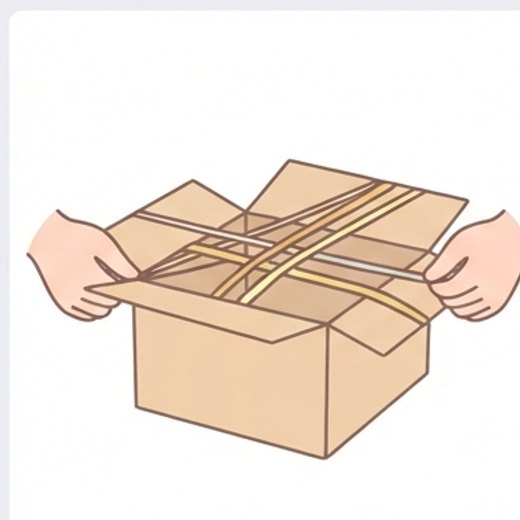
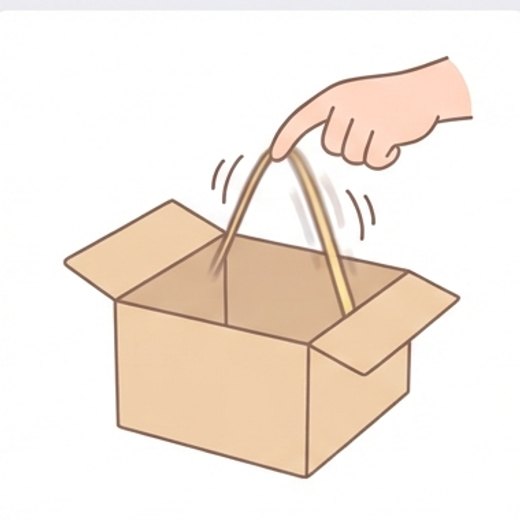
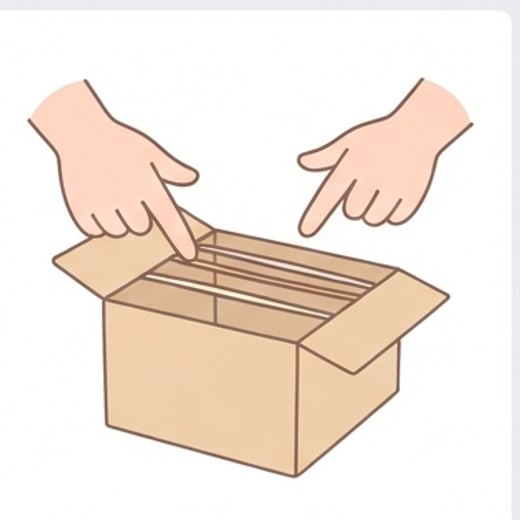
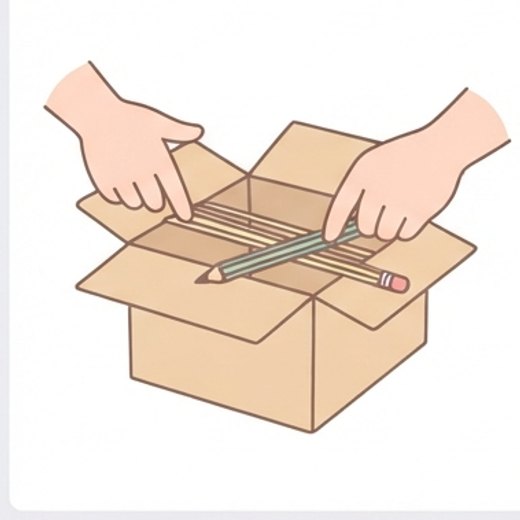
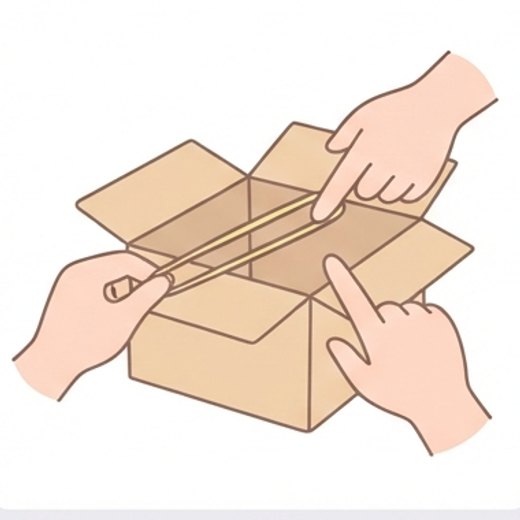


What happens: Thicker bands make a lower, fuller sound, and thinner ones a higher sound. A shorter vibrating part sounds higher. A band stretched tighter sounds higher too.
Why: Each rubber band vibrates when you pluck it, and the pitch of the sound depends on how fast it vibrates. A thin, short and tighter band vibrates faster, so it sounds higher. A thick, long and looser band vibrates more slowly, so the sound is lower. The empty box makes the sound louder, because the vibrations pass to its walls and the air inside.
Safety: Do not stretch rubber bands toward your face: they can slip and snap painfully into your eyes. An adult stays nearby.
Try next: Try playing a simple tune by picking bands according to their pitch.
You can see and feel sound
Sound is vibration, and you cannot always see it. Experiments help you notice it: rice bounces on plastic wrap when a pot is banged nearby, a ruler hums on the edge of a table, a string carries a voice between two cups. Kids even feel their own voice buzzing in their throat. Feeling it in the body helps them grasp an idea that is hard to explain in words. That makes sound experiments some of the liveliest, because a child uses hearing, touch and sight all at once.
Sound experiments are usually noisy, so pick a time that won’t bother the neighbors or the family. On the other hand, they can be quiet too: for example, feeling your voice with your fingertips. Kids love making music, so these experiments easily turn into building their own instruments, like a rubber band guitar from an empty box. This approach helps them move from random noise to a real understanding of sound.
How to do them and what to remember
Loud sounds damage hearing, so do not bang a pot right next to a child’s ear and do not play music or sounds at full volume. Agree to keep the experiments at a moderate volume. Stretch rubber bands away from faces, and keep your face away from the ruler when you let it go. These simple rules keep things fun and safe, and gentle sounds do not tire the ears or get on anyone’s nerves.
It helps to record sounds on a phone and compare them: which is higher, which is lower, and why. Older kids can change the length of the ruler or how tight a rubber band is and listen for the change in pitch. This connects physics and music. For younger ones, it is enough to listen and show with their hands: high sound, hands up; low sound, hands down. This way learning becomes a game. Remember that every new sound is a reason to ask why it sounds the way it does.
FAQ
Are loud sounds bad for children’s hearing?
How do you make a string telephone?
Can we use glass cups for sound experiments?
How do I explain high and low sounds?
Water experiments · Air experiments · Safe kitchen chemistry · Light and color · Plant experiments · Magnets, forces and motion · Body and senses · Science Experiments for Kids at Home